
In this multi-part tutorial series, I will demonstrate how MAAS and Juju have helped me quickly setup and consume both bare metal servers and virtual machines in our lab in an automated, cloud-like fashion.
The first part will cover the high level introduction to MAAS and Juju, my MAAS installation, and MAAS network service configuration.
Part 2 is here.
What is MAAS?
MAAS, or metal-as-a-service, is a piece of software from Canonical that is aimed to provide automation to physical servers. MAAS brings the speed and flexibility of cloud to setting up of physical servers. It does that by handling all boring stuffs including IPMI, DNS, DHCP, PXE, etc. in an automated way. Technically MAAS can also work with virtual machines in the same way it does with bare metals. We will need to communicate with a virtual machine manager (vCenter / SCVMM / Openstack, etc.) via GUI or provided APIs to create those virtual machines. Both bare metals and VMs will need to have network connectivity to MAAS.
What is Juju?
Juju (meaning ‘magic’) is an open source application modeling tool that orchestrates the deployment, configuration, up- and down- scaling, and operation of applications. It supports major public clouds (AWS, GCP, Azure) as well as private clouds (OpenStack, VMWare, and MAAS).
Juju has collections of scripts called ‘charms’ which include operation necessary to deploy, configure, scale, operate and upgrade applications. A Juju charm also specifies the relations/dependencies between different applications. You can download prebuilt Juju charms from Charm Store (similar to Apple AppStore or Google Play), or you can write your own charms.
Our lab setup
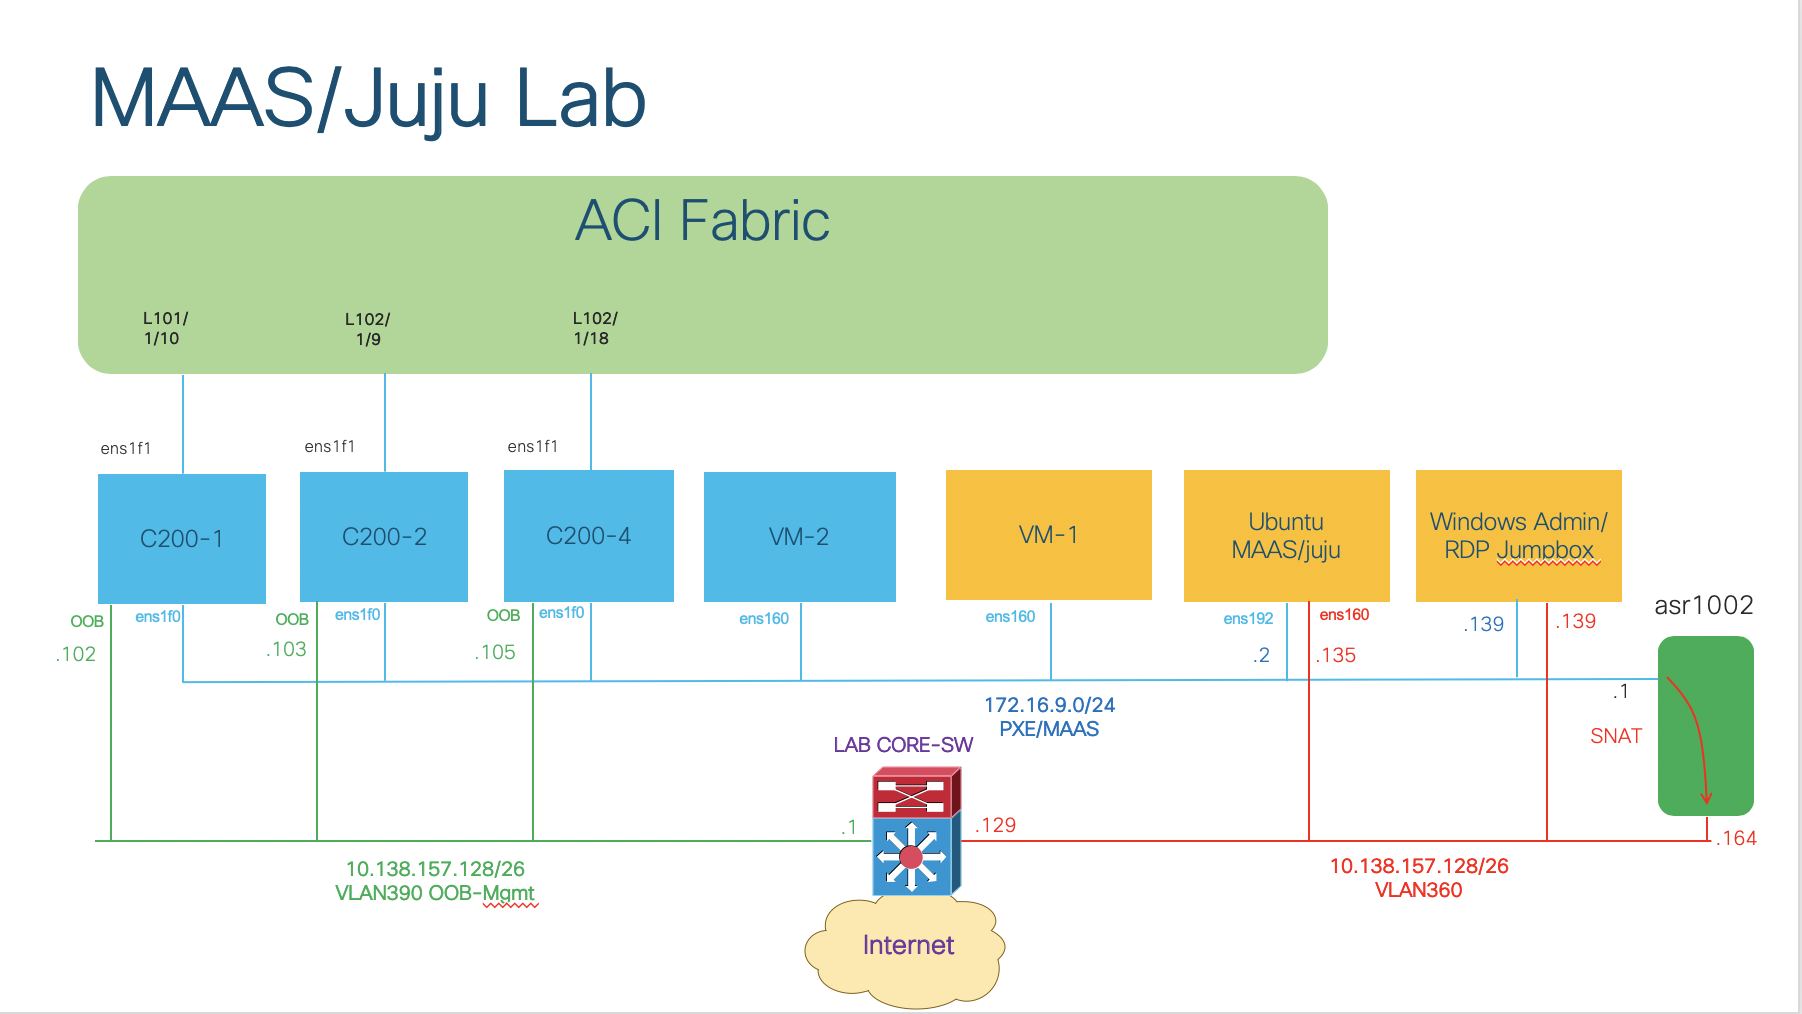
We have:
- 3 bare metals servers (Cisco UCS C200 M2)
- 4 virtual machines in VMWare ESXi:
- 1 Windows jumpbox/bastion host RDP for remote access
- 1 VM running Ubuntu 18.04 Bionic release for MAAS/Juju installation
- 1 VM for Juju controller bootstrap (VM-1)
- 1 VM to be setup and consumed as part of the MAAS cloud (VM-2)
- Management ports of the bare metals are connected to the OOB-Management network in VLAN390
- NIC1 of all bare metals and virtual machines are connected to the PXE/MAAS network in VLAN369 with my own addressing scheme and not routable outside. SNAT in an external router (ASR1002) is needed to enable communication outside.
- Inter VLAN routing and Internet access will be provided by our lab core switch (Cisco 6509)
Setting up MAAS
First thing first, we need to install our MAAS packages on our Ubuntu VM. I assume that you already know how to configure interfaces and routing on an Ubuntu machine, as well as network connectivity from VMWare to the outside, so I am not covering those in this tutorial. We will need one network interface in the PXE/MAAS network, in my case it is the ens192 interface with IP address 172.16.9.2/24. It will be used for DNS and DHCP services on the MAAS subnet.
MAAS supports high-availability setup where rack controller and region controller can be separate on different nodes. If you want such deployment scenario, you can refer to MAAS documentation about High availability. In our lab, we only need one VM running all-in-one MAAS rack- and region-controller:
sudo apt-get update
sudo apt-get install maas
After MAAS has been install, create the first admin account:
sudo maas initCreate first admin account
Username: admin
Password: <your_admin_password>
Again: <your_admin_password>
Email: <your_admin_email>
Import SSH keys [] (lp:user-id or gh:user-id):We can skip the SSH keys import and provide it later. We can now login to the MAAS GUI at http://<MAAS-IP>:5240/MAAS with the admin credentials we created in the previous step.

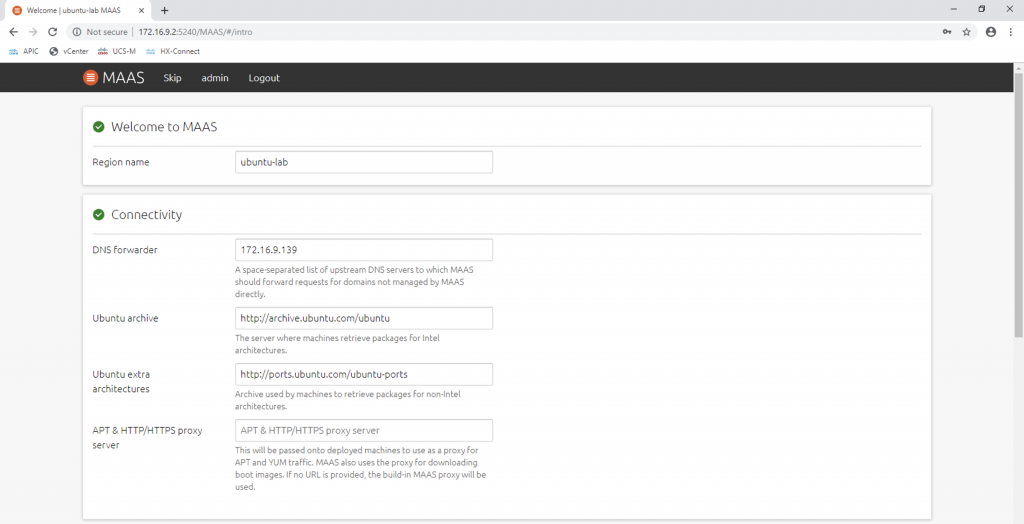
Then we will need to provide several parameters to MAAS, including region name, upstream DNS server:
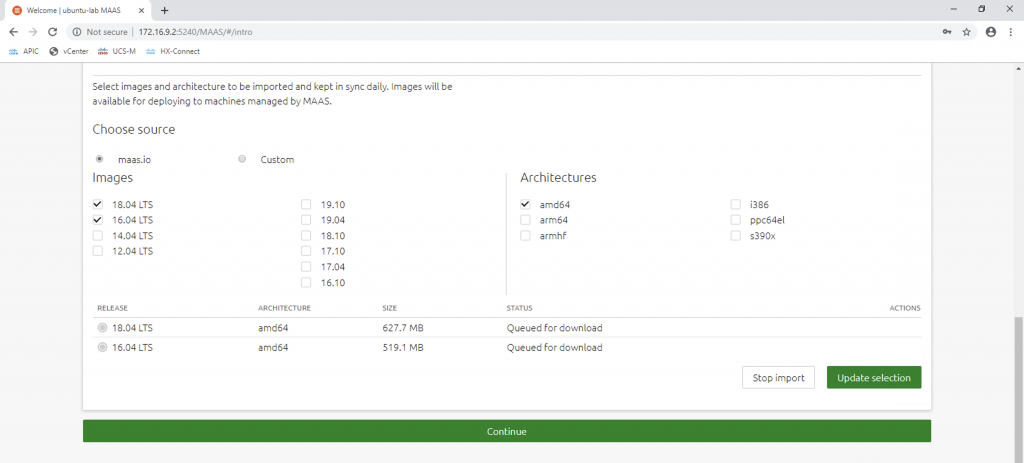
In the next step, we will need to specify the OS images we want MAAS to import to local repo, and keep them in sync with the online repo. The free version of Ubuntu supports only Ubuntu and CentOS images. If we want to use Windows or ESXi host images for the nodes, we need to have Ubuntu Advantage. In my setup I need MAAS to import Ubuntu 16.04 (Xenial) and 18.04 (Bionic) amd64 releases. Later on we can specify which image to be installed on a MAAS machine when we add the machine to the MAAS cloud. We can go ahead and click on Continue and MAAS will download the images in the background.
Remember the SSH keys we skipped during the MAAS init phase? We can now add them to MAAS on the GUI. It is the public key of the client that will be use for passwordless SSH to the MAAS machines. We can paste the content of the key file ~/.ssh/id_rsa.pub (beginning with ssh-rsa) on MAAS GUI:
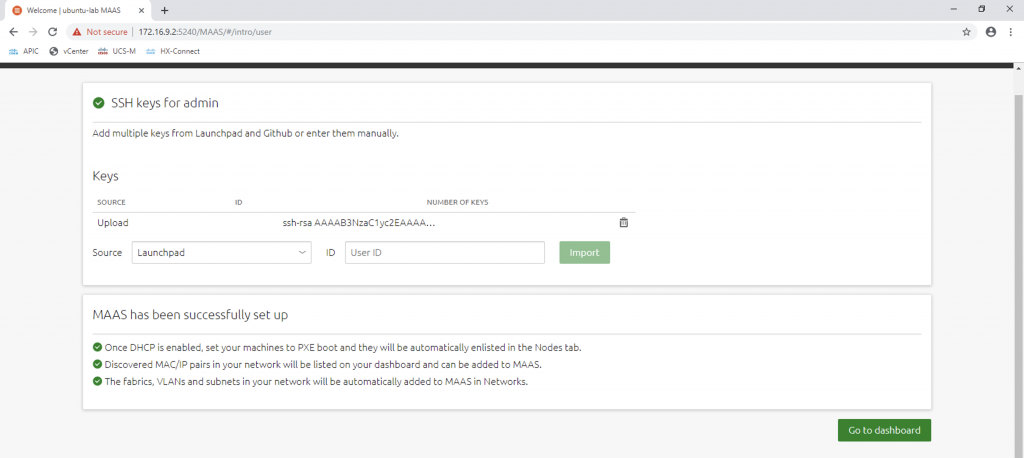
We can then go to dashboard and continue with the configuration of the network services. It is necessary to enable communication between a MAAS machine and the controller.
Configuring network services in MAAS
DNS
In our setup we will use MAAS as the authoritative DNS server for all the MAAS machines in the ciscospdc.local domain. For all domains not managed by MAAS, we will use an upstream DNS server that is reachable by MAAS to resolve. DNS service is provided by BIND as part of the MAAS setup.
DHCP
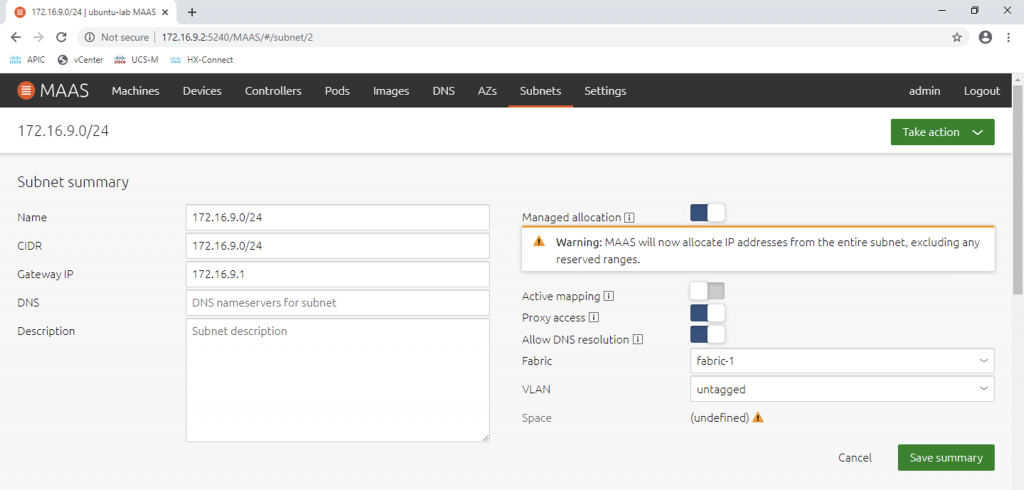
DHCP is needed for the PXE boot of the MAAS machines. By default MAAS does not enable any DHCP service on any subnets. We will need to configure it for the PXE/MAAS network (the 172.16.9.0/24 subnet).
On the Dashboard, we can drill down to the DHCP configuration by opening Subnets, then clicking on the subnet address (172.16.9.0/24), then enable Managed Allocation:
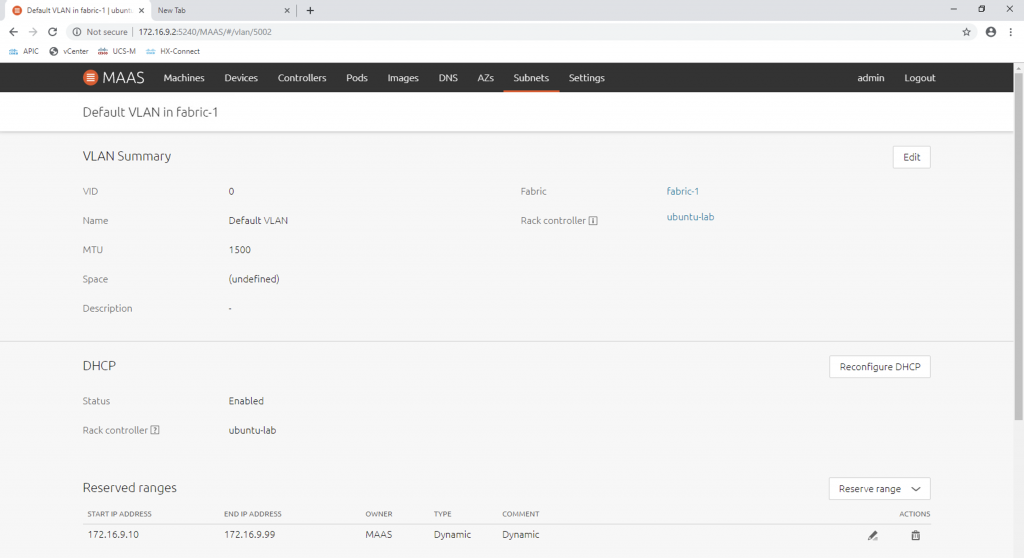
We can also control the IP address range that MAAS will use to provide to enlisting machines (machines that do PXE boot). In my case I reserve from 172.16.9.10 to 172.16.9.99 as dynamic range for MAAS:
After this step we have successfully configure MAAS to communicate with the machines. In my next post, I will go through the machine enlisting and machine commissioning, and also cover some of the caveats during the process. Stay tuned!
Part 2 is here.
Quite useful article for learning, I am currently working on a PoC of integration openstack with ACI, it’s so lucky to find your post! Thank you so much for sharing!